Healthy Lunches

I wrote a guest post for …And Love it Too. Below is the summary- you can read the full post here (link to And Love it Too).


onionringcute

 I try to keep the following in mind for school lunches:

  • The kids have almost no time to eat. If I pack them something like blueberries they will eat one at a time, run out of time, and come home with a full lunch box. So, it must be easy to eat in big bites- fast! Sad, I know, but a fact of our public school life. Nothing too crunchy or time consuming.
  • Pushing their comfort zone with a bit of a new vegetable or something healthy that they marginally like is OK. Packing food they don’t like just results in hungry kids. This may seem obvious, but one of my daughters is so particular it is almost impossible to guess what she will like even when I try my best. Asking her is a bad idea as she will only admit to liking fries and chocolate.
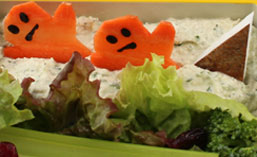
  • A little bit of fun makes their whole lunch enjoyable. A note. A carrot cut like a flower. A fun food pick.

For my lunch I use all the vegetables in my refrigerator left from the previous week’s CSA. I make a big bone broth and random vegetable soup and freeze it in individual portions. Then I know I will eat well when I am hungry and busy.

That covers lunch but there is one more important healthy food to plan for school: Birthday parties! Our school serves a lot of treats in the classroom. Often events crop up with very little warning. So, I keep my freezer full of Just In Case Cupcakes. (I think most of us Mom’s with special eaters do the same!) I usually freeze the chocolate cupcakes from my cookbook. Today I am sharing my Colorful Sweet Potato Cake recipe (which just happens to be paleo friendly).

yumumm

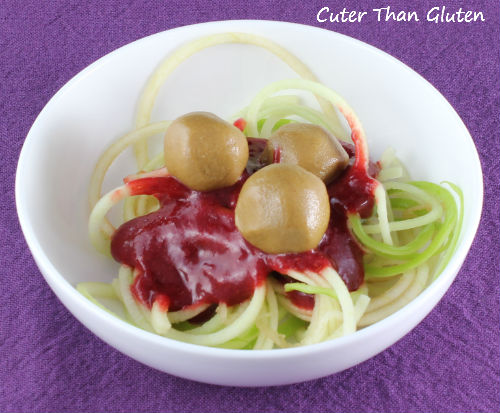
Photo: Colorful Sweet Potato cake with coconut whipped “cream” frosting, homemade gummies, and cupcake guys.

colorful cupcake

Colorful Sweet Potato Cupcakes Recipe on And Love it Too!

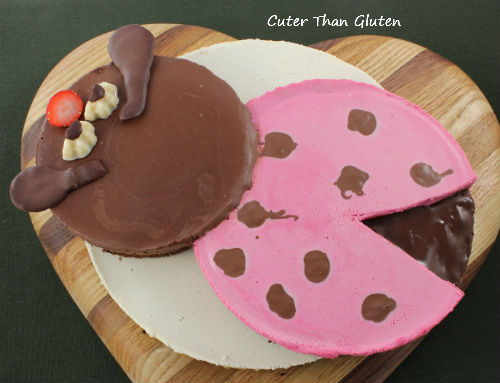
(I will post a recipe for the naturally colored frosting (see photo below) on in the next couple of weeks.)


cartoonblog

My kids and I decorated a bunch of cupcakes like monsters and then I photographed them. Afterwards I gave the photos to my kids and asked them to write one page cartoons. Most of them are quite nonsensical and being the mom I think they are the cutest thing ever!

Dessert “Spaghetti and Meatballs” (Vegan)

spag 2

I have been looking at recipes with spiralized vegetable noodles for years, but never took the initiative to buy a spiralizer. Then I started following a relatively new (but very prolific) blog “Inspiralized“. First of all, the name is so cute, and the photos are beautiful. I finally went out and bought one. The first recipe I came up with was this dessert; spaghetti and meatballs.

spag meat

You can make individual servings or a family style serving. If you spiralize the apples in advance I suggest soaking them in lemon water so they don’t brown.

On another note: I spiralized a butternut squash and one piece was about 20 feet long. My kids ate the way toward each other- this is a photo of the last 10 feet when they got full and quit.

spag 4

Dessert “Spaghetti and Meatballs” Recipe
~~~~~~~~~~~~~~~~~~~~~~~~~~~~~~~~~~~~~~~~~~

MEATBALLS
(Make more or less depending on how many servings you need. I do 3-4 per person.)

1 cup sunbutter (unsweetened)
2-4 tablespoons creamed honey (liquid honey will be too runny), sweeten to taste
1 cup (estimated amount) macadamia nuts

1 pound frozen strawberries (other red fruits can be substituted)
2 tablespoons honey
1/2 cup water

1-3 apples (1/2 an apple per person)

~~~~~~~~~~~~~~~~~~~~~~~~~~~~~~~~~~~~~~~~~~

Prepare a tray with parchment paper (and make room in the refrigerator for the tray.)
Combine sunbutter and creamed honey then form a small ball with the mixture. Stuff a macadamia nut inside and roll in your hands until smooth. Repeat and set out on the tray, not touching each other, and chill until serving.

Combine the strawberries, honey, and water in a saucepan and cook on medium-low heat until the strawberries are broken down. Transfer to a blender or food processor and blend until smooth. Taste for sweetness and add honey if needed. If the sauce is the thickness of marinara sauce then it is done. If it is too loose, return it to the pan and reduce it. Chill the sauce until serving.

Spiralize the apples. (I do thin noodles).

spag 3

Assembling the dessert is fairly obvious, and eating it is fairly delicious.

~~~~~~~~~~~~~~~~~~~~~~~~~~~~~~~~~~~~~~~~~~

I am sharing this recipe on

Chocolate Cherry Thumprint Cookies

choccherrycookies

I took my inspiration for these cookies from the combination of two traditional cookies- thumbprint cookies and peanut blossoms. My favorite chocolates when I was a child were chocolate covered cherries. I remember trying to decide whether or not to eat them in one bite to avoid the mess or eat them in several small bites but end up a bit sticky!

Chocolate Cherry Thumbprint Cookie Recipe
~~~~~~~~~~~~~~~~~~~~~~~~~~~~~~~~~~~~~~~~~~

1 1/2 cup almond meal/flour
1/4 teaspoon baking soda
1/8 teaspoon salt
2-3 tablespoons buttery spread or butter
1/3 cup raw agave syrup
1/2 teaspoon vanilla extract
20-24 sweet black cherries, pitted and frozen
1/2 cup semi-sweet melted chocolate

~~~~~~~~~~~~~~~~~~~~~~~~~~~~~~~~~~~~~~~~~~

In a medium mixing bowl combine the almond flour, baking soda, and salt. Then mix in the buttery spread and agave. Set in the refrigerator to chill.

Set a baking dish or tray with parchment paper in the freezer until cold. Dip the frozen cherries in the melted chocolate and set them out on the chilled baking dish. Place them back into the freezer.

Preheat the oven to 350 degrees F. Prepare two baking trays with parchment paper. Roll about 1 tablespoon of cookie dough into a ball, set on the tray and flatten slightly. Repeat until all of the dough is used. Bake the cookies for 6-10 minutes until they start to get a bit of color on the edge near the pan. (Don’t overcook these- they will continue to cook after they are out of the oven.)

Set the hot cookies (still on the baking tray) on a cooling rack. Quickly press a chocolate covered frozen cherry into each cookie while they are still hot.

Wait until the cherries have thawed and enjoy!

~~~~~~~~~~~~~~~~~~~~~~~~~~~~~~~~~~~~~~~~~~

I am sharing this recipe on

Lemon Cake (Grain-Free)

Well, it’s my Birthday today! For my Birthday this year I am giving you all 40% off of my cookbook, Culinary Creativity: Let your restrictions set you free. Head over to Amazon and purchase the book for $14.95 (off from $24.95). November 18-20, 2013. This is a super great deal and I know you are going to love the hard cover and photos of every item in the book.

Plus what’s a Birthday without cake, so here is a yummy lemon cake for you.

But first, one more thing, if you are inclined to give me something for my Birthday, here is my wish: more reviews of my book on Amazon. Now read on and enjoy some cute cakes.lemoncake

Usually I am opposed to any recipe requiring too much effort. I consider separating eggs to be too much effort usually. However, it is difficult to make coconut flour cakes feel light and fluffy, and separating the eggs really makes a difference in this situation.

This cake is barely sweet. It only has a 1/4 cup of honey in the whole cake. I am enjoying minimally sweetened desserts lately, but if you are used to full sugar this might seem a bit “light”. Each time I make it, I have also made a sauce to go with it. I highly recommend that you do the same.

The first cake I made was lemon with blackberry sauce (from my cookbook) and whipped coconut cream (also from my cookbook).

lemoncaketable

Next I made it cute. It is really cute isn’t it?

Then I made the cake with orange zest. And I made an orange caramel sauce to go with it. I didn’t measure the ingredients for that caramel so I don’t have a recipe to give you. Here is the gist of what I did: cooked down about 1 cup of orange juice, 1/4 cup of honey, orange zest, and 1/4 cup of coconut milk until it thickened into a caramel. (Sauce pan, medium-low heat). NOT sure on the specific quantities… but I make sauces like this by eye frequently and they always turn out fine.
orangecake

Lemon Cake Recipe
~~~~~~~~~~~~~~~~~~~~~~~~~~~~~~~~~~~~~~~~~~

WET
1 teaspoon vanilla extract
1/4 cup apple sauce
4 egg yolks
3 tablespoons of honey
1/3 cup coconut water (apple juice would most likely work too)
zest of 1 lemon

DRY
2/3 cup coconut flour
1 teaspoon baking soda
1/4 teaspoon salt

WHITES
6 egg whites
1 tablespoon honey

~~~~~~~~~~~~~~~~~~~~~~~~~~~~~~~~~~~~~~~~~~

Preheat the oven to 325 degrees.

Prepare a 6-8 inch round cake pan with parchment paper and oil the sides.

In a large mixing bowl whisk together the wet ingredients.

In a small mixing bowl combine the dry ingredients. Add the dry ingredients to the wet and stir.

Beat the egg whites and honey together until it forms a stiff peak (I suggest using a stand mixer for this). Add half of the egg whites to the other ingredients and stir together. Add the second half of the egg whites and gently fold them in.

Spread the batter evenly into the cake pan and bake for about 30-40 minutes until it is cooked through and slightly spongy. It will be darker gold on the edges and just turning color in the center.

Set out on a cooling rack and cool completely before removing from the pan and frosting.

~~~~~~~~~~~~~~~~~~~~~~~~~~~~~~~~~~~~~~~~~~

I am sharing this recipe on

Grain-Free Chocolate Cake

spunkycakeKelly, from The Spunky Coconut, has a great white chocolate pie recipe. I have made it too many times (you know- as in eating too many treats). I came up with some fun modifications and ways to make it cute that I want to share with you. Plus I created a new cake base and I now call Kelly’s recipe “white chocolate frosting” instead of “pie”.

Above I cooked my cake base as a three tiered cake. Then I took Kelly’s recipe and split it into three parts: white chocolate (standard), pink chocolate (standard plus beet juice- can’t taste a difference), and dark chocolate.

spunkycake2Another time I split Kelly’s recipe and added peanut butter to part, and chocolate to another part and made a swirl by pouring all the white in first, then drizzling the dark over the top.

spunkycake3

And another time… I made mini cakes in tart pans and let three lucky girls decorate three cakes with homemade gummies, chocolates, homemade pink frosting, and cereal.

ladybug5

So here is what my cake looks like up close.

Frosting Recipes
~~~~~~~~~~~~~~~~~~~~~~~~~~~~~~~~~~~~~~~~~~

Notes on Kelly’s recipe:
1) It works perfectly as written.
2) I prefer the white without vanilla extract.
3) I find it works a bit better to “bloom” the gelatin before adding it to the mixture. Just soak the gelatin in a couple of tablespoons of cold water. (I learned this watching Master Chef).
4) I don’t bother melting the cacao butter separately- I just toss it in after the heat is off, then blend it all together.

Peanut Butter White Chocolate: The Spunky Coconut Recipe plus… 1/4 cup of peanut butter or more to taste (I like it with salted peanut butter).

Dark Chocolate: The Spunky Coconut Recipe minus 2-3 ounces cacao butter… plus… 2 ounces baker’s chocolate (I use Ghirardelli) This can be a bit “un-sweet” so you may want to add a bit of honey (but I don’t).

Pink: The Spunky Coconut Recipe plus… a few tablespoons of beet juice. (I put beet peels in a pot with about a 1/4+ cup of water, boil it, then strain it.)

Grain-Free Chocolate Cake Recipe
~~~~~~~~~~~~~~~~~~~~~~~~~~~~~~~~~~~~~~~~~~

1 1/2 cups mashed Hannah Yams (sweet potatoes are not the same but they can work)
1/4 cup sunbutter
2 eggs
1/3 cup honey
1/2 teaspoon apple cider vinegar
1 teaspoon vanilla extract
1/4 cup egg white (protein powder)
1/4 cup cacao powder
1/4 teaspoon salt
1/2 teaspoon baking soda
3 tablespoons cacao nibs

~~~~~~~~~~~~~~~~~~~~~~~~~~~~~~~~~~~~~~~~~~

Preheat the oven to 350 degrees F. Prepare a cake pan or pans with parchment paper and oil the sides. You can use an 8 or 9-inch cake pan. Use smaller or bigger pans depending on the design plan. Remember to leave room for the frosting (a pan with tall sides).

Combine all of the ingredients in a mixing bowl.

Smooth the batter in the pan.

Bake for 20-35 minutes. The time will depend on the size of the pan. The cake is done when it is spongy to the touch in the center of the cake and the sides are looking done.

Allow the cake to cool. Loosen it from the pan, then put it back into the pan. Pour the frosting on top and allow the frosting to fully set in the refrigerator. Run a knife around the edges and carefully tip the cake out of the pan.

~~~~~~~~~~~~~~~~~~~~~~~~~~~~~~~~~~~~~~~~~~

I am sharing this recipe on Allergy Free Wednesdays,

Fruit Sundaes

 bananasundae
The idea: to create a delicious dessert without any sweetening other than whole fruits. No concentrated fruit juice, no stevia;  just whole food ingredients.
The Banana Ice Cream was the launching point. This recipe has already made its rounds on other blogs, certainly not my original creation. But I am re-sharing it because everyone deserves to know exactly how to make this sundae.
The other stuff… Coconut Whipped Cream- use the recipe in my book but omit the sweetener. Deydrated strawberries are from Trader Joes. Unsweetened coconut flakes- I toasted them in the oven. Pecans. A cherry. And homemade fruit juice gummies. There are recipes online but I hope to post a good recipe for that soon.
bananasundae5
This sundae got rave reviews and everyone (including people who eat typical ice cream) said it was sweet enough and very creamy.

Banana Ice Cream Recipe
~~~~~~~~~~~~~~~~~~~~~~~~~~~~~~~~~~~~~~~~~~

1 banana per person
cacao powder (for chocolate)
Frozen cherries (for cherry ice cream)

~~~~~~~~~~~~~~~~~~~~~~~~~~~~~~~~~~~~~~~~~~

Chop up the bananas and set them out on a tray in the freezer. Once the bananas are frozen you can make your ice cream. You need a food processor- a blender will not work.

Put the bananas in the food processor with cherries or cacao (or both- my favorite!). Use a ratio of about 3 cups to 1 cup (bananas to cherries). As for the cacao, add to taste but I do about 1 tablespoon per 2 bananas.

Process until the whole thing comes together as an ice cream- soft serve almost. It takes a bit of shoving around so don’t be discouraged if it feels like it isn’t working. Also don’t over process or it will get slimy. You can put it in the freezer for a bit before serving but I don’t like it to be fully refrozen.

~~~~~~~~~~~~~~~~~~~~~~~~~~~~~~~~~~~~~~~~~~

I am sharing this recipe on